TUTORIAL: Smokey Contrast
Sorry about the lateness to anyone keeping up with my weekly posts!
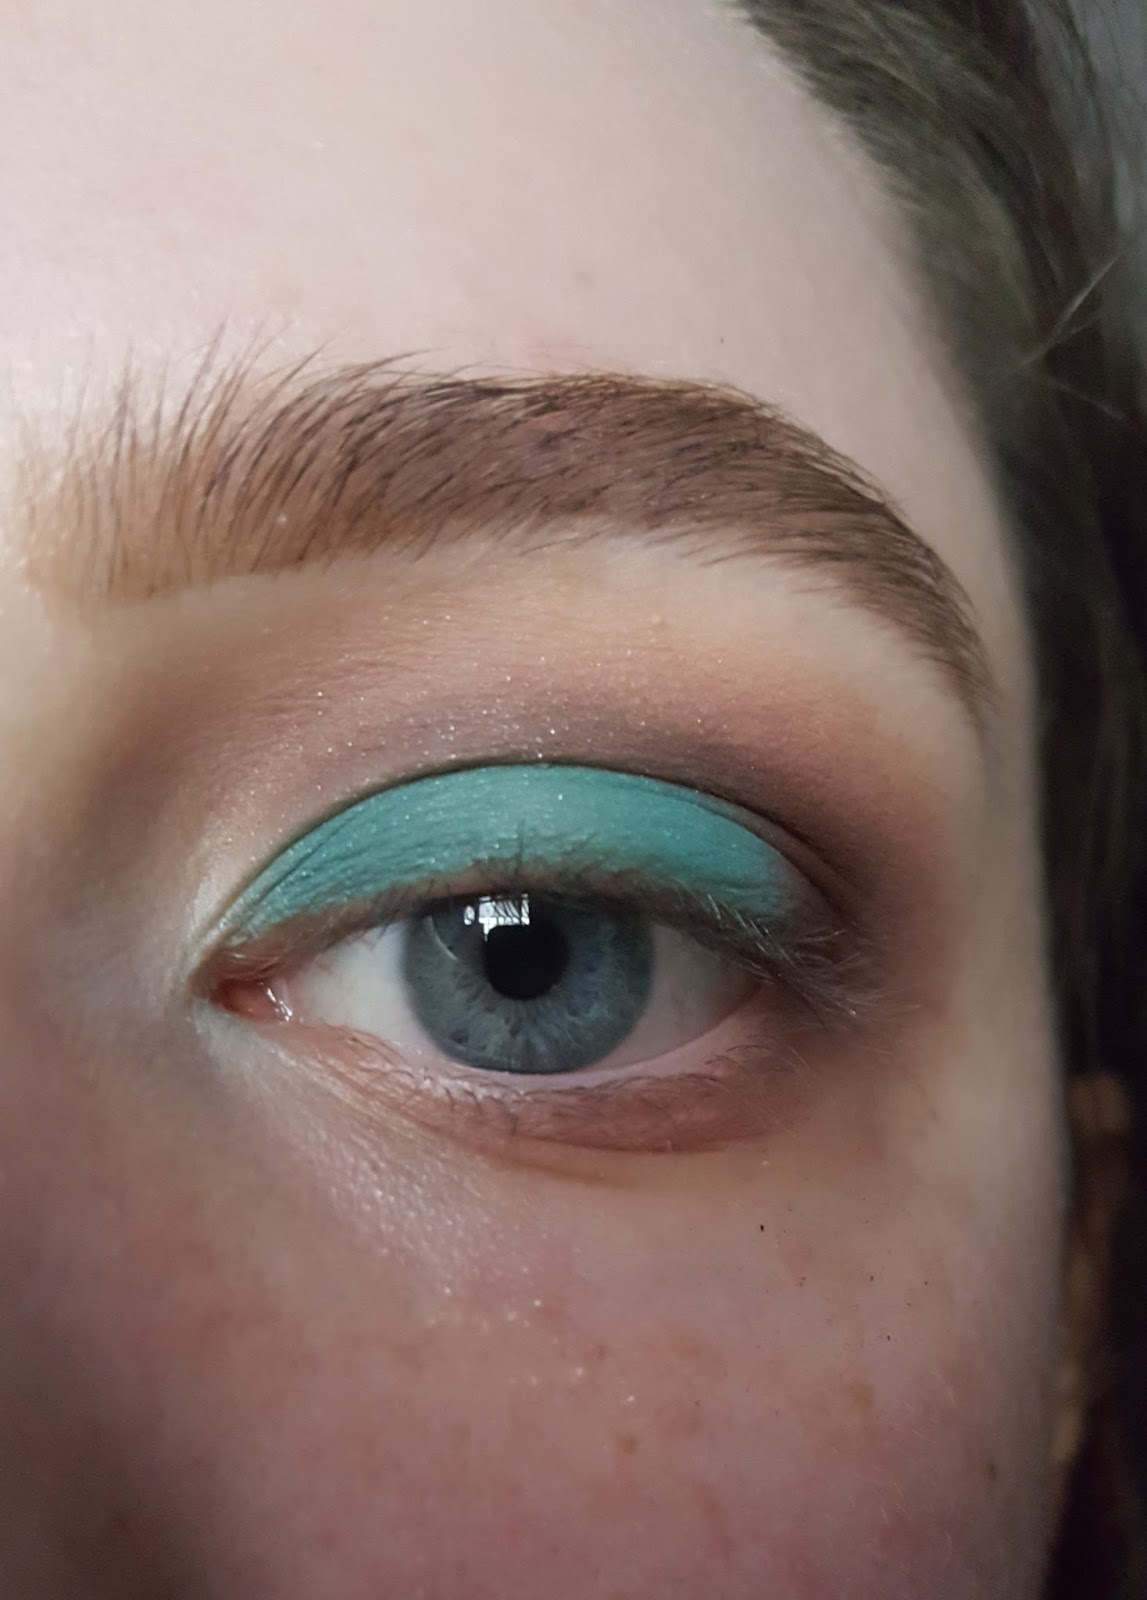
This look is definitely dramatic, featuring both colour and depth.

Starting off I primed my eyes and laid down a skin tone base from crease and up to help blending later.

Then I went on to my lid shade, a deep satin teal and simply packed that into the shape you can see, an oval on my mobile lid.

After this I went straight to the crease colour a plum-meets-burgundy shade. I wish this had been a little brighter/warmer and I would actually suggest laying down a transition shade prior to this step as I did have trouble blending it out.

After the initial placement it's a whole lot of blending and adding colour back in. I went over a few times with a clean blender as well as adding in more colour where I felt I needed it.

I did take a touch of a pinkish mauve to transition as I was having some trouble.

Once that was finished up I reintensified the lid and finished my face makeup (I do eyes first these days) and then got started on the lower lashline, placing a little mauve first and using a smaller brush to smudge the burgundy almost the whole length of the lower lashline.

Final eyeshadow step was to take a silver-white and mix that with a light teal to highlight my inner corner. Feel free to take a lighter of darker shade to fit your preferences.
Then to finish you just need to tighline and add some mascara.


This is the look finished, I hope you liked it.

Until next time, have a fun day,
Cassy
This look is definitely dramatic, featuring both colour and depth.

Starting off I primed my eyes and laid down a skin tone base from crease and up to help blending later.

Then I went on to my lid shade, a deep satin teal and simply packed that into the shape you can see, an oval on my mobile lid.

After this I went straight to the crease colour a plum-meets-burgundy shade. I wish this had been a little brighter/warmer and I would actually suggest laying down a transition shade prior to this step as I did have trouble blending it out.

After the initial placement it's a whole lot of blending and adding colour back in. I went over a few times with a clean blender as well as adding in more colour where I felt I needed it.

I did take a touch of a pinkish mauve to transition as I was having some trouble.
Once that was finished up I reintensified the lid and finished my face makeup (I do eyes first these days) and then got started on the lower lashline, placing a little mauve first and using a smaller brush to smudge the burgundy almost the whole length of the lower lashline.

Final eyeshadow step was to take a silver-white and mix that with a light teal to highlight my inner corner. Feel free to take a lighter of darker shade to fit your preferences.
Then to finish you just need to tighline and add some mascara.


This is the look finished, I hope you liked it.

Until next time, have a fun day,
Cassy


Comments
Post a Comment